I think the question I am asked more often than any other is how I transfer my design from paper to fabric. There are very many ways of doing this, and I talk about a few of the more usual ones in my little e-book “Simple Stitchery” (available on the free patterns page of this site). But often people are intrigued by what appear to be graphite pencil lines (but they’re not!) on my fabric …
I use a slightly risky method to transfer my pattern – I say risky as there is the potential for damaging both self and fabric in the process – which is why I would never recommend anyone else to try it, or at least issue the warning “do so at your own risk!” But it does give excellent results so if you are interested, then here’s how I do it …..
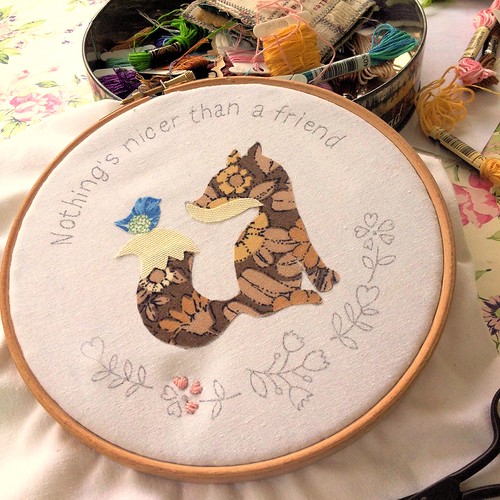
When I’m creating a design like my little Friendly Fox (he’ll be in the July issue of the Bustle & Sew Magazine) I first draw him out with pen and ink, making many revisions and using plenty of tracing paper before I’m completely happy with the result. Then I scan the image and clean up any background smudges etc using Photoshop. Although I draw with a fine black pen, I use the colour changer tool to make sure that any lines that have scanned as a dark grey are black as this technique only works with strong black lines. Finally I reverse the image and print a mirror image onto ordinary paper using my laser printer.
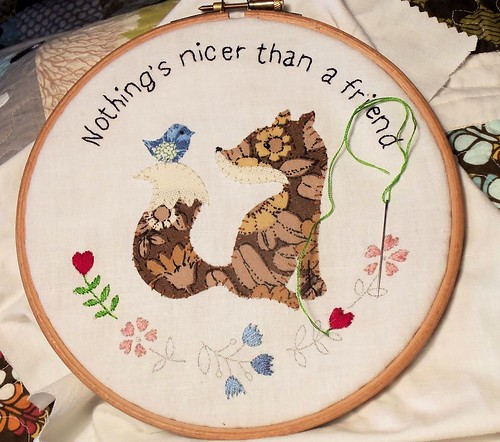
Then it’s over to the heatpress. I set the temperature at 195oC and the timer to around 70 secs. The fabric goes in right side up and the paper on top, right side down. Once the fabric has cooled, then I peel off the paper – which can then be used for tracing applique shapes onto my Bondaweb as it’s a reverse image.
I find this method is great for crisp detailed transfer of images onto light coloured fabric. It is a permanent transfer, so you have to be sure to cover the lines with your stitching/applique. Obviously it only works with cotton, linen or cotton/linen blend light coloured fabrics and there is always the danger of scorching your fabric.
I have done many test prints in the past, and it’s taken a lot of trial and error to arrive at the above settings, which is why I wouldn’t advise anyone to simply follow my method. But if you do have the right equipment (I don’t know if it would work with a hot iron or not, I’ve never tried) and are willing to experiment, then you could find the results are well worthwhile.
Wow!
Julie xxxx
Thank you, I’ll give it a try. 🙂
Hi Helen,
What a lovely picture – I don’t know how you manage to come up with these beautiful ideas whilst having to try and concentrate on the Wedding of the Year, too! I hope everything is on schedule for Rosie and Dan’s wedding; from what you have been telling us about the preparations I’m sure it will be a wonderful day to remember for you all. Is Miss Daisy going to be a bridesmaid? (Now that would make it a day to remember!)
Love,
Diana.
Aw, thanks Diana. Sorry to say Miss Daisy ISN’T going to be a bridesmaid – a combination of black fur and mischievous behaviour meant she was eliminated from the list of possibilities very early on! xx
Surely a misprint on the heat setting. 195 degrees C not 1950C.
Haha yes Diane – but I couldn’t work out how to make the degree symbol!!