
Next up in our Stitch Directory is Satin Stitch. Satin stitch might look like one of the easiest embroidery stitches there is – but be warned – it is actually one of the most difficult to work correctly and neatly. It covers the area to be stitched with long smooth stitches placed close together, giving the effect of continuous, solid, smooth colour.
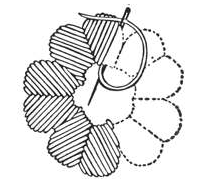
When working this stitch you carry your thread across the space you want to fill and then return underneath your fabric to the starting point again. The skill is in making your stitches lie evenly and closely together and in creating a neat firm edge to the shape being filled.
You can work your satin stitches in any direction, and they can be of any length, but the longer they become, the more unwieldy and untidy they may appear. For this reason any large shape you want to fill with satin stitch should be split up as much as possible. This change in the direction of your stitches has the added bonus of giving light, shade and depth to your shape which is most effective.
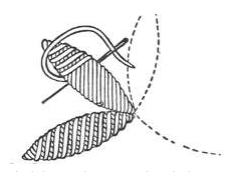
You can work running stitch beneath your satin stitch, or work two layers in different directions to give a raised, padded effect. It’s also nice to whip your satin stitch as shown in the diagram above to give a raised and corded effect. If you are doing this, then your satin stitch should be slanted and your whipping stitches placed almost at right angles and slightly apart.
I do hope that you’ve found this post useful, pop back next week when we’ll be looking at Scroll Stitch!
*If you missed last week’s post about Running Stitch you can find it here.*
Leave a Reply