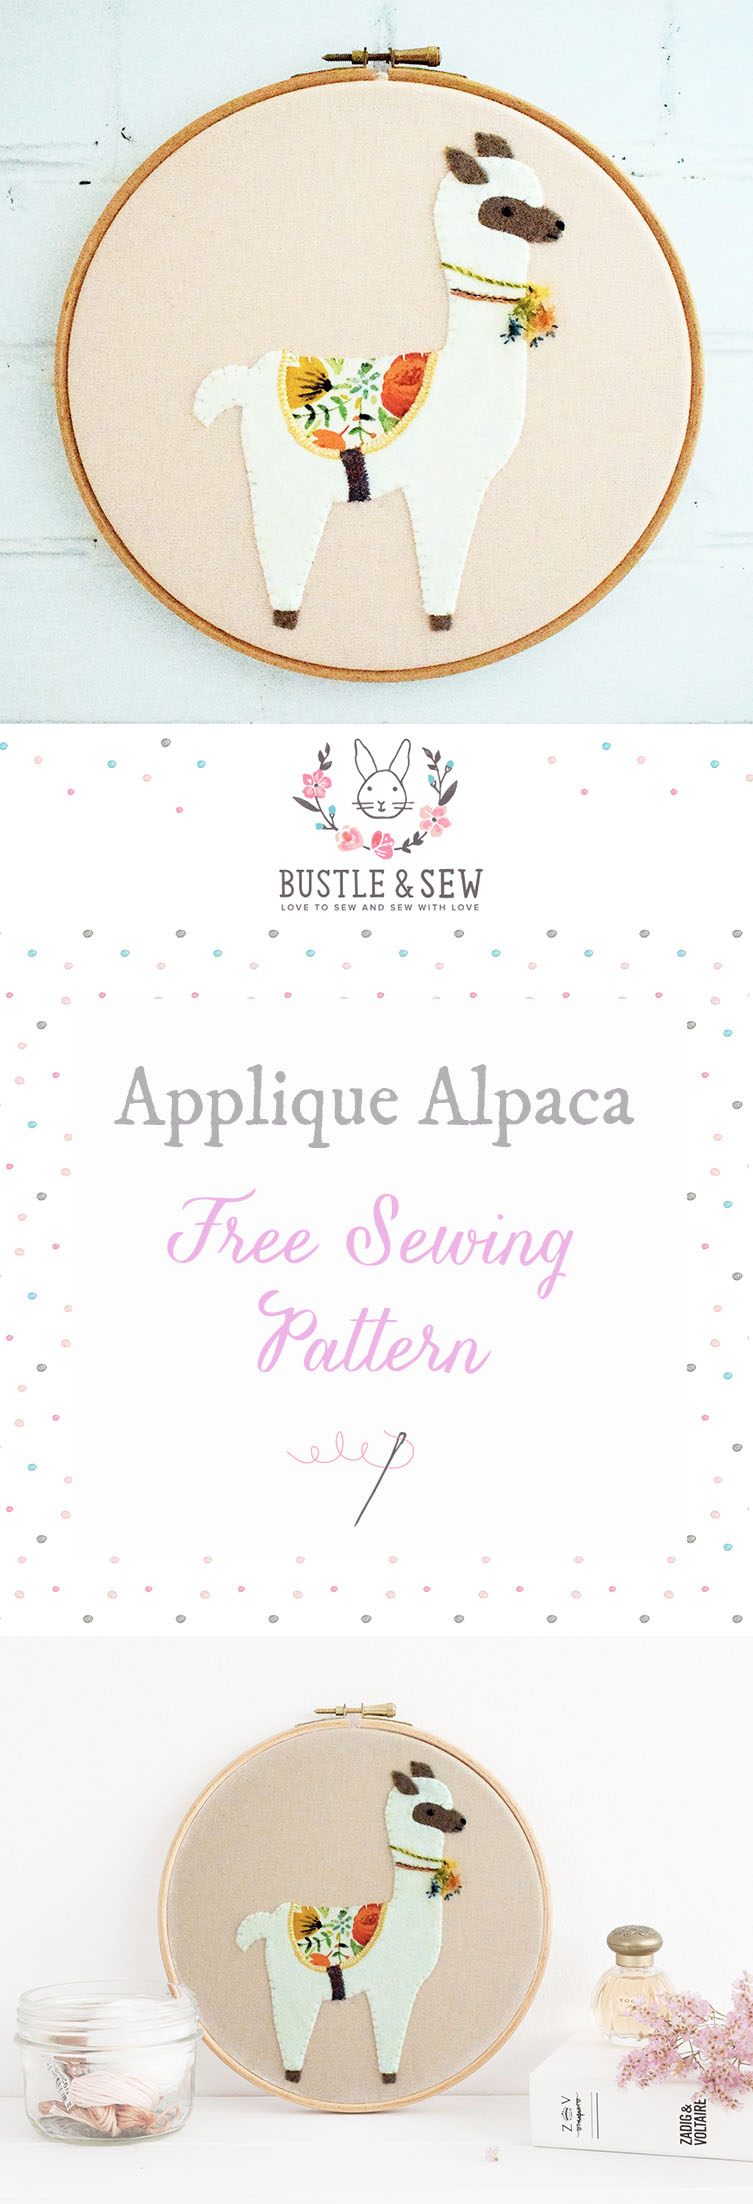
A long time ago now I was lucky enough to be able to visit the beautiful Andes Mountains in Peru and, as well as Machu Picchu (of course!) saw lots of small mountain villages – and herds of alpacas too! The memory of this experience will remain with me forever, and so I particularly enjoyed creating this little alpaca hoop. The applique is very simple, and the embroidery isn’t particularly difficult either. I completed my alpaca in just one evening.
If you’d like this tutorial as a free PDF file with step by step pictures & stitch guide, then click the button below and I’ll send it to you. (If you already receive our free newsletter then you’ll find the tutorial waiting for you in your newsletter readers pattern library).
![]()
Materials:
● 10” square background fabric (I used a dusty pink linen blend)
● 7” x 6” cream or white felt
● Small scraps pale brown felt
● 2 ½” x 2” printed cotton fabric
● Stranded cotton floss in cream, pale brown, black and a selection of colours that work well with your printed cotton fabric.
● Bondaweb
● Temporary fabric marker pen
● 8” embroidery hoop
Method:
● Using the reverse template trace the alpaca shape onto the paper side of your Bondaweb. Download your templates HERE. Cut out roughly and fuse to the reverse of your felt, then cut out carefully. Begin with the cream felt – or main bodyshape. Peel off the backing and position in the centre of your background fabric but don’t fuse yet.
● Now trace, fuse and cut out the muzzle, ears and hooves in the same way, allowing extra for them to underlap the cream body shape apart form the front ear which sits on top of the main shape. Peel off paper backing and position, but don’t fuse yet.
● Repeat the above steps with the floral fabric for the alpaca’s blanket. When you’re happy with the positioning of all your applique shapes fuse into place with a hot iron protecting your work with a cloth.
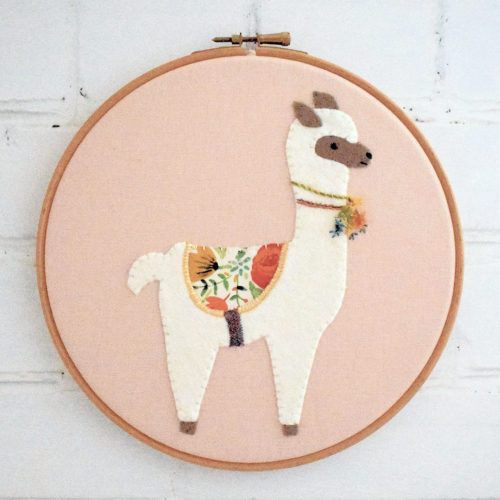
● Using two strands of cream floss for the main body and blanket and two of light brown floss for the muzzle etc, secure the shapes to the background fabric by working short straight stitches at right angles to the edge of the shapes.
● Using your temporary marker pen mark in lines for embroidery.
● Now work embroidery using two strands of floss throughout. The eye and nose are black satin stitch and the mouth is back stitch.
● The girth is basketweave stitch (see tutorial on the Bustle & Sew blog) and the blanket edging is buttonhole stitch.
● I used whipped chain stitch and pekinese stitch for the cords around the alpaca’s neck, but if you don’t want to try these stitches, then simple chain and/or back stitch would work well too.
● The pompoms are turkey or ghiordian knots, or you could use clusters of French knots, or simply work them in satin stitch if you preferred.
● When you have finished stitching press your work lightly on the reverse, being careful not to flatten your stitches and then mount in your hoop.
● Your hoop is finished!
![]()
If you’d like this tutorial as a free PDF file with step by step pictures & stitch guide, then click the button below and I’ll send it to you. (If you already receive our free newsletter then you’ll find the tutorial waiting for you in your newsletter readers pattern library).
![]()