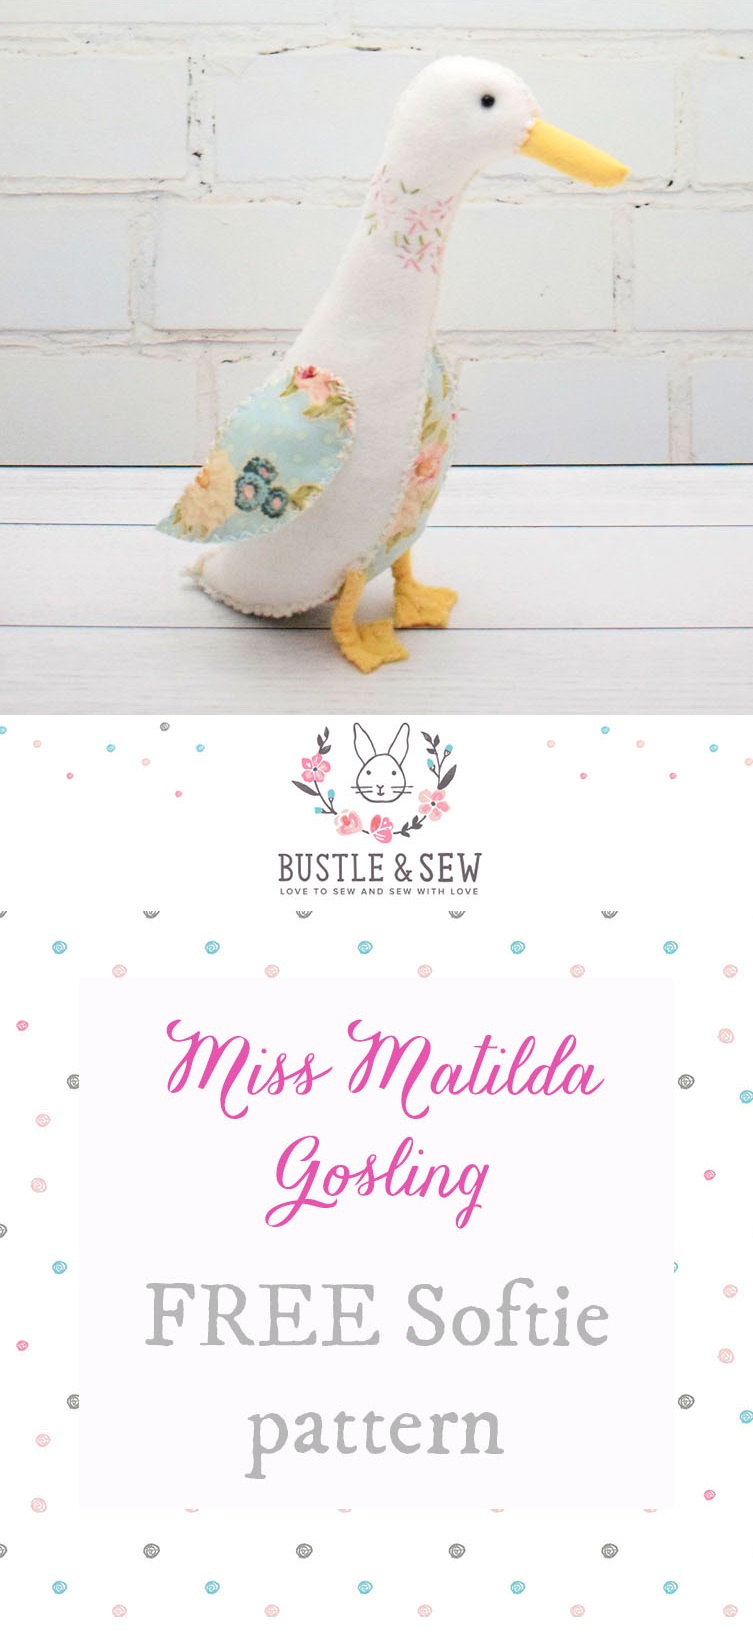
I first designed a pattern called “Little Geese” six years ago now. Miss Matilda Gosling is a revised and updated version of that original pattern. I like to think that my softie making skills have developed a lot over this time, and think the alterations I’ve made to my original pattern reflect this.
You don’t need a pebble to keep your geese standing firm and tall any more (now I don’t live by the beach I appreciate it can be hard to get hold of pebbles!) and I’ve added some pretty – but very simple embroidery to her neck. Her legs are wired, but if you’ve never tried this technique before then Matilda is a good project to begin with as her wiring is very simple indeed.
If you’d like this tutorial as a free pdf file with extra tips and images then click the button below and I’ll send it to you. (If you already receive our free newsletter then you’ll find the tutorial waiting for you in your newsletter readers pattern library).
![]()
Materials:
● 12” square white felt
● 7” x 5” printed fabric (I used a Tilda printed
quilting cotton)
● 4” square yellow felt
● 7” galvanised garden wire (not too thick as you need to be able to bend it fairly easily)
● White and yellow stranded floss or cotton pearl thread
● Black thread
● 2 small black spherical beads for eyes
● DMC stranded floss colour 4500 (optional for embroidery on neck)
● Temporary fabric adhesive spray
● Temporary fabric marker pen
● Toy stuffing
Download your template HERE
Method:
● Cut out all pieces as directed on the full size templates. The gusset and wings are cut from felt and fabric together. To do this spray your felt piece with temporary fabric adhesive and place your cotton on top. Pat down firmly. Now cut as a single fabric, remembering to reverse the wing template.
● With your temporary fabric marker pen mark the gusset position on the chest and also the point on the side body edges where you will insert the leg wire. It’s best to do this now as the smooth shapes mean you won’t be certain where to join and insert when you’re stitching your goose.
● All pieces are joined with wrong sides together and using a decorative cross stitch. To make the stitch use two strands of floss and whip over the edge in one direction, then return the other way to complete the stitch.
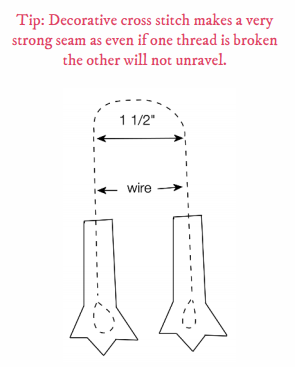
● First make the legs. Take your wire and fold over ¾” at each end to make a loop. Bend your wire in half, with the loop at the top having a 1 ½” diameter.
● Stitch the pairs of leg pieces together and push the wire inside as shown in diagram.
● Now catch the sides of the felt leg and stitch them together at the back. This has the effect of narrowing the leg.
● Join the two body sides together down the top from the beak opening to the tail.
● Join the head from under the beak to X. Stuff the head lightly.
● Insert the gusset from X to the tail, inserting the legs where marked on the template. (Note: treat the gusset/fabric sandwich as a single piece of fabric making your stitches through both felt and cotton). Insert stuffing as you go, so that the loop of wire at the top of the legs is held in place firmly by the stuffing. This is what will keep your legs from wobbling.
● Stitch the beak seam and stuff beak. Attach beak to head with the seam at the bottom inserting more stuffing as you go so everything is nice and firm.
● Bend legs and feet into shape so your geese stands nice and firm without wobbling.
● Cross stitch around the edges of the wings and stitch into place on the body using the photographs as a guide.
● Mark the position of the eyes with glassheaded pins. Take your time over this and make sure they’re absolutely level from all sides and your goose has a nice expression. When you’re happy stitch beads into place with black thread.
● Now add the embroidery. Use two strands of floss and simply randomly add straight stitches, perhaps loosely placing them as if they were flowers and leaves depending on how the floss colours work out as you stitch.
● Remove all temporary fabric marker lines.
● Miss Matilda Gosling is now finished!
![]()
If you’d like this tutorial as a free pdf file, then click the button below and I’ll send it to you. (If you already receive our free newsletter then you’ll find the tutorial waiting for you in your newsletter readers pattern library)
![]()