Velvet is the most luxurious fabric to use and wear, but many people are put off working with it as they think it must be difficult to achieve good results. It is indeed a little trickier than some other fabrics, but I hope these few hints and tips will help give you confidence to achieve the best possible result you can.
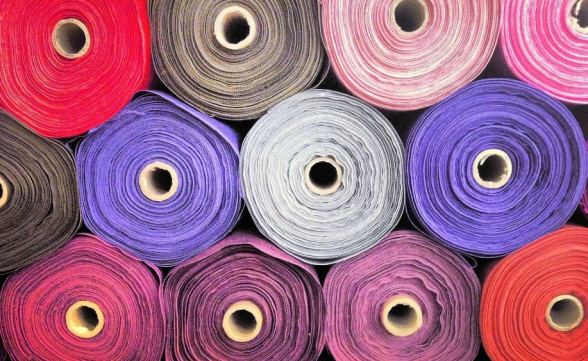
But, before we begin, did you know that the term “velvet” actually refers to the way the fibres are woven to give that characteristic upstanding pile. Velvet can be woven from a variety of fibres, most commonly cotton and polyester. Silk velvet is the most expensive, with prices often several hundred dollars (or indeed pounds sterling) for a single yard.
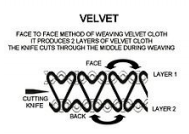
The word “velvet” derives from the French word “velu” meaning shaggy. Velvet is woven on a special loom that weaves two thicknesses of the material at the same time. The two pieces are then cut apart to create the pile effect, and the two lengths of fabric are wound on separate take-up rolls. This complicated process meant that velvet was expensive to make before industrial power looms became available, and well-made velvet remains a fairly costly fabric.
Due to this, if you’re not confident at working with this fabric, then it may be a good idea to search out remnants and off-cuts that are often available from fabric retailers at significantly reduced prices, and use these for practice before embarking upon your first “real” project. Velvet is indeed slippery to work with and does mark easily but, please don’t regard it as “scary” or out of reach since, with a little practice, good results are achievable.
Before you begin to stitch, you need to decide the direction that you wish the nap to run. The nap is the direction the pile lies in. Run your hands across your fabric – one way will feel soft and smooth and the other way has more resistance – almost like ruffling an animal’s fur the wrong way. You need to decide which way should feel soft and smooth. If you’re stitching a garment then that means do you want the fabric to feel soft and smooth as you run your hands up or down your garment. The most usual way is to smooth downwards – but there aren’t any hard and fast rules to follow, it’s down to personal preference.
Again, if you’re making a garment, once you’ve identified your preference lay the fabric face down in a single layer. Don’t fold it, and make sure all the pattern pieces are facing the same way so the direction of the pile is consistent across the whole garment.
Pin the pattern pieces to the wrong side of the fabric using fine pins and mark any darts with tailor’s tacks. If the velvet is made from natural fibres use a cotton or silk thread since polyester thread would be stronger than the fabric and may cut into it.
You should choose a manmade thread for velvet composed of man-made fibres and a cotton or silk thread for velvet composed of natural fibres.
Using a walking foot on your sewing machine is the best way to have maximum control over slippery fabrics such as velvet as this ensures the two layers of fabric feed through your machine at the same rate. If you use a normal presser foot the different layers may slip and slide, so feeding through at different speeds and ending up stitched together incorrectly, and nobody enjoys ripping out stitches!
Always sew in the direction of the pile and test on a scrap of fabric before working on your project. If the fabric is puckering try loosening the tension on your machine. If you are using a velvet fabric without stretch hold the fabric taut as you sew, however, for stretch velvets don’t hold the fabric taut as this will stretch it out of shape.Trim your seam allowances as normal, but also cut along the fold of any darts and steam them open to reduce bulk.
You do need to take extra care when pressing velvet – pressing it in the normal way can lead to disaster by irretrievably flattening the pile. Instead place it face down on a towel and hover the iron over it using a maximum steam setting or even blasting steam at it for maximum effect.
If you’re making a garment, then be sure to hang it for 24 hours after pressing before hemming. As the fibres relax they may “give” a little and if you hem before resting your work you may well end up with an uneven hem.
Have you got any tips for working with velvet? Leave them in the comments below, we’d love to know!
Want more hints & tips? Then click below to get our free newsletter – you’ll even get some fab free patterns too…
*Article originally appeared in Bustle & Sew Magazine. Find out more HERE
Leave a Reply