Finishing raw edges to prevent fraying is a key part of most sewing projects and if you don’t have a specialist overlocker (serger) then one of the easiest and quickest ways to do this is to use pinking shears. These resemble regular shears but instead of flat blades they have triangular shaped “teeth” that will make a zig-zag cut in the fabric. As well as preventing fraying they’re great for cutting curves as they have a similar effect to clipping your seam allowance to make it lie flat.
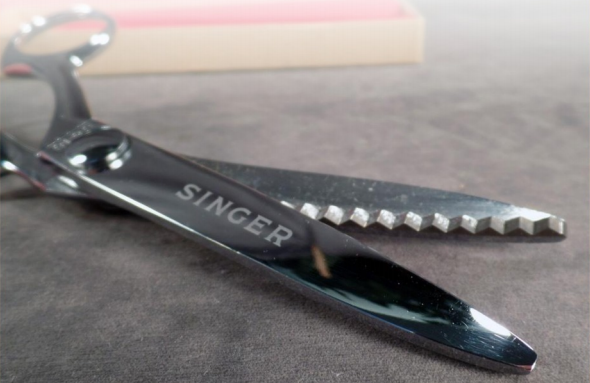
Pinking shears are usually around 8 – 9” long. Good quality shears have ball joints to ensure the blades operate smoothly and some have soft-grip handles too. Purchase the best quality you can afford so they will last you as long as possible.
When cutting with pinking shears be sure to hold them straight as you cut as they won’t provide good results held at an angle. After you’ve made the first cut open the shears and line up the teeth with the last notch of your first cut and close the blades again. Continue in this way for a neat and even edge with all the notches matched up. Always sew the seam before trimming the edges with pinking shears as this will give you a consistent seam allowance and neat effect.
Don’t try to cut too many layers at once as the fabric will slide and warp making for an untidy edge. When cutting a delicate fabric consider putting a heavier scrap behind for stability.
Don’t use your pinking shears on paper or card as this will dull the blades in the same way as fabric shears. Keeping them in a drawer with other metal items can also result in their becoming blunt. If this does happen then you will need to have them professionally sharpened.
Have you got any tips for using pinking shears? If so please comment below, we’d love to know!
*Article originally featured in Bustle & Sew Magazine. Find out more HERE
Pinking Shears – I have heard that cutting a piece of wax paper help to make them work easier. And wondered if cutting into a piece of aluminum foil would help sharpen them since you would do that with metal stamps.
Ooh, thanks for the tip! We will have to give that one a go. Xx
Interesting ideas. I would not think waxed paper would be good, since one should not cut paper. I don’t know about aluminum foil but it doesn’t sound like a good idea, either. I haven’t done this with my pinking shears, but I do make cuts on very fine sandpaper to sharpen regular scissors. I hope Helen makes a comment on these ideas, she probably knows more about it than I.
Hi Glenna, I have found aluminium foil effective,though to be quite honest as I’m super careful with my (rather expensive!) pinking shears they don’t need doing more than once in a blue moon – and probably not even then! I did read that you shouldn’t do this as it can “round” their points, but I would imagine that would only be if you try it regularly. I don’t know about sandpaper, though I remember my dad used to sharpen knives and scissors on a stone so it might be similar? xx
Thanks for the reminder about using pinking shears. I may start doing that around the edges of applique backgrounds so that they do not fray as I am working with them. I always store my pinking shears in the box in which they came in order to keep them safe, now I have another reason for doing so!
I bought myself a pinking blade for my rotary cutter. I use it to cut out fabric that frays…