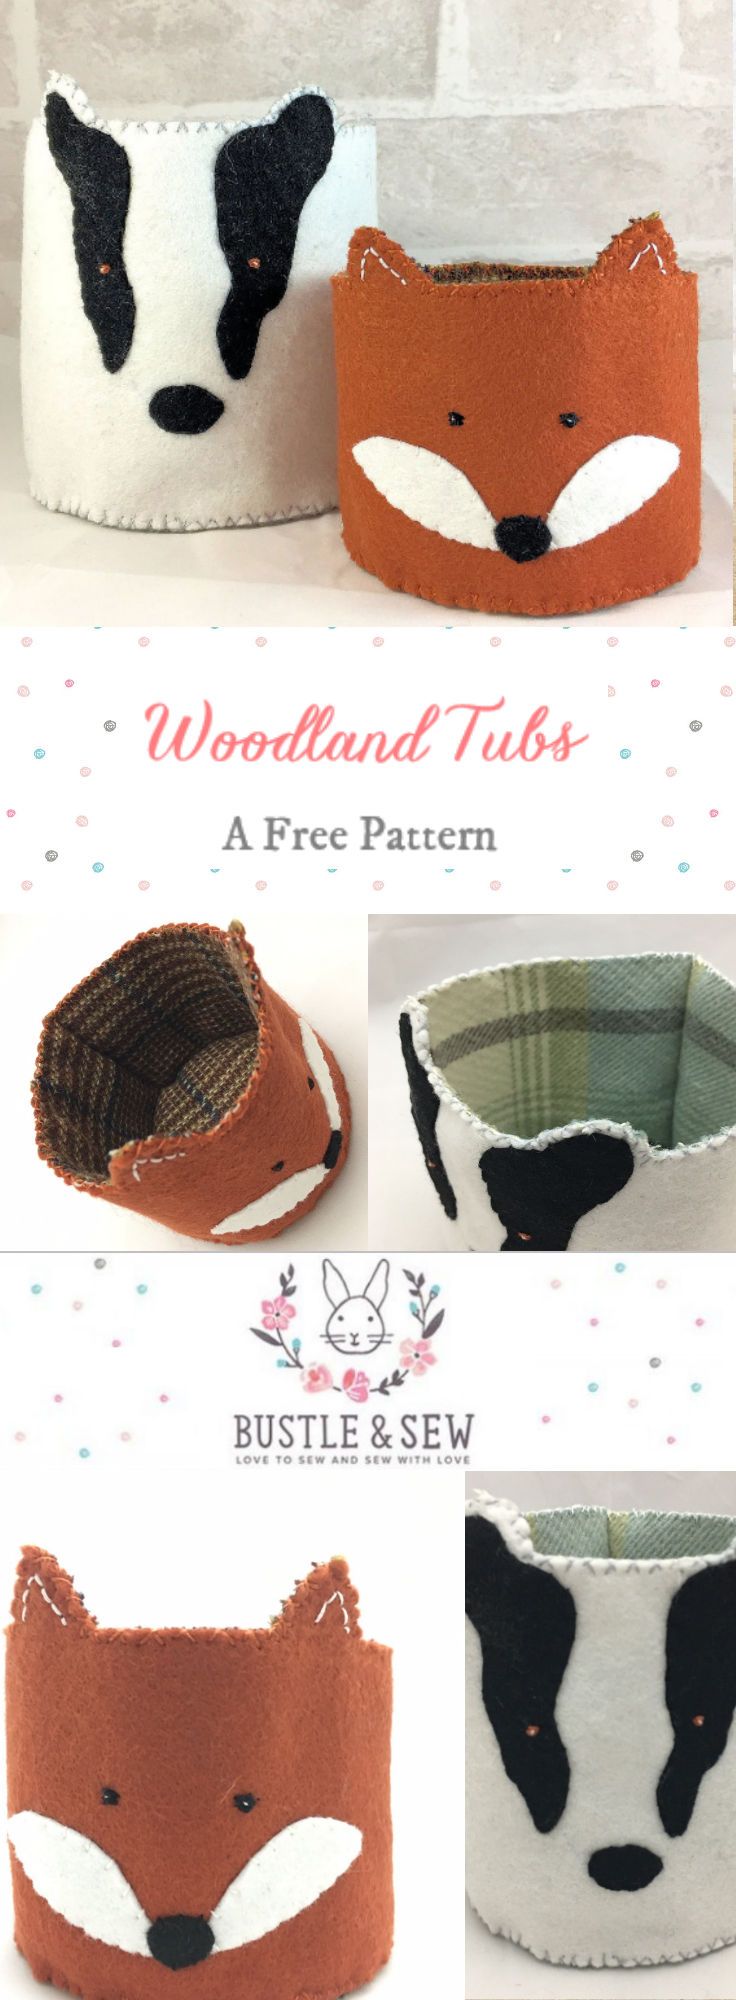
The November Bustle & Sew Magazine is (as I am sure everyone is tired of hearing!) our 70th issue! As always there were six Bustle & Sew patterns between the covers – and I thought it would be fun to share one of them here on the blog – the little Woodland Mini Tubs.
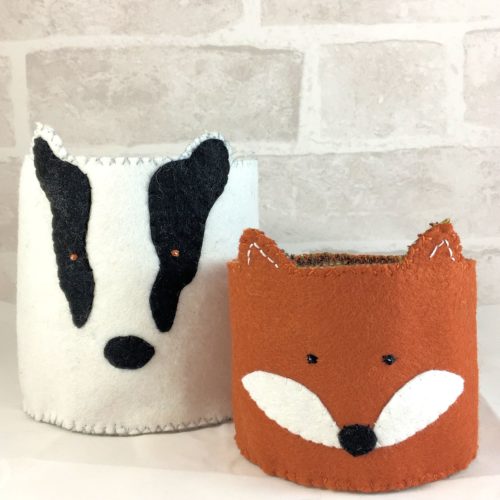
They’re small(ish) but beautifully formed and feature two of my favourite woodland animals from here in the UK – the fox and badger. They’re really easy to make, just a simple bucket shape with fairly minimal applique – sufficient to indicate the animals’ features. And, as they’re made from felt there’s no worries about seam allowances and fraying, they’re completely stitched by hand. These little tubs would make great gifts – maybe filled with sweets or lovely scented products. They’d be great for craft fairs and other fundraising events too and ass they’re so simple to assemble they’d be great for children to enjoy making too. Badger tub is 5” tall x 5” diameter and fox tub is 3” tall x 4” diameter. (Excluding ears)
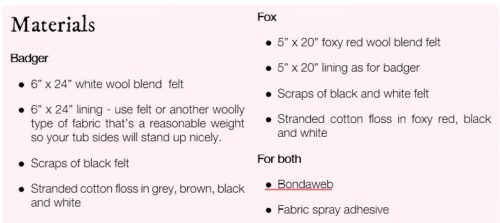
To make your Woodland Mini Tubs you will need:
Method
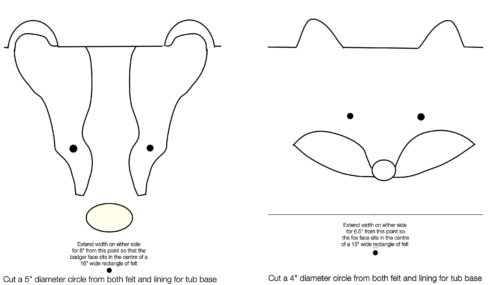
● Cut out all pieces from the templates, remembering to extend them at the sides as directed.
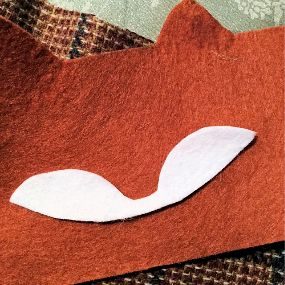
● Trace the animal face markings onto the paper side of your Bondaweb. Cut out roughly. Fuse to the reverse of your felt and cut out smoothly. Peel off the paper backing and position on the tub exteriors using the photographs as a guide. (Note: cut the fox face markings in one piece – see photo below and then position the nose on top).
● When you’re happy with the positioning fuse into place using a hot iron and protecting the felt with a cloth.
● Stitch the shapes into place with short straight stitches worked at right angles to the edges of the shapes using two strands of matching floss.
● The eyes are satin stitch. The tox’s eyes are black and the badger’s are brown (black simply wouldn’t have shown up). Make the eyes sparkle with a tiny white stitch.
● Stitch fox ear details in back stitch using two strands of white thread.
● When your animal faces are finished press lightly on the reverse.
● Now assemble the tubs. Place the lining pieces face down on a clean flat surface and spray with fabric adhesive. Place the exterior pieces on top and press down so they adhere to each other.
● Work a decorative cross stitch along the top edge. Do this by working whip stitch over the edges all the way along in one direction, then return in the other direction to complete the stitch.
● Join the two short edges in the same way and then insert the base.
● Your tubs are now finished.
This project is also available in the Newsletter Readers’ pattern library as an easy to print and use pdf file including full-size templates. If you’d like the printable version then please do CLICK HERE to subscribe to our Newsletter. It’s free and you’ll always be first to hear all our news, receive special offers and bonus patterns too. And we promise NEVER to share your details with anyone else.
So darling! Thank you!
Aw thanks Valerie x
Hi Helen,
Thank you so much for these two super patterns. Even I might get one finished in time for Christmas – this Christmas!
Love,
Diana.