When I’ve got a couple of hours to spare (although it’s extremely rare these days!) I love to get my sewing machine out and work on my latest WIP. It’s one of my favourite ways to relax but too often I quickly become frustrated when my bobbin stops winding evenly or my thread keeps breaking (find out how to solve both of these problems HERE). But one thing I couldn’t quite get my head round was changing the needle on my machine. Cue a quick call to Mum and she sent me the following – I do hope you’ll find it as useful as I did!
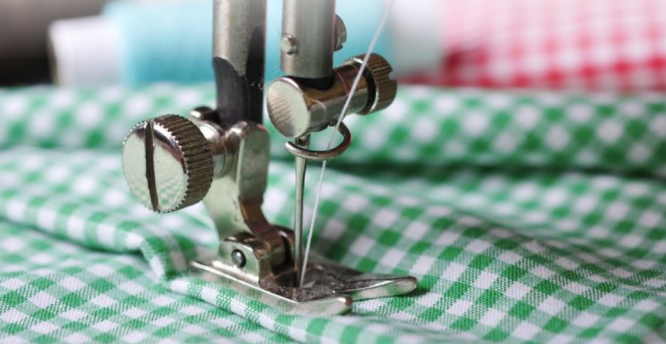
It’s important to change your sewing machine needle regularly as needles quickly become blunt, or even slightly bent which can cause real problems when stitching. In fact almost the first thing I do when I’m experiencing problems with my machine is to change the needle. This can be a little fiddly, but isn’t hard to accomplish with a little practice…
● Place a small scrap of fabric under the presser foot, then using the screwdriver that came with your sewing machine loosen the screw holding the needle in place by turning it anti-clockwise. The needle will just drop out of the holder and the fabric will prevent it from dropping through to the bobbin.
● Choose the right needle for the project you’re working on and insert as far as possible into the holder. Machine needles have a flat back so there’s no danger of inserting it the wrong way round. Generally the flat surface is towards the back of the machine, but do check your manual if you’re in any doubt.
● Holding the needle in position tighten the screw by hand, then finish with a couple of turns with the screwdriver. It’s important the screw is tight to stop the needle becoming loose due to the vibration and movement of the machine as you stitch. A needle that becomes loose will wobble about and bend or break, in the worst case damaging the throat plate and bobbin case.
● If your needle does break when you’re stitching then this might be because it’s the wrong size (generally too small) for the materials you’re using. Try a size up and see if that’s any better.
We also included this handy guide in the June issue of Bustle & Sew Magazine. You can find out more about the magazine HERE.
We share lots more hints, tips and goodies with our newsletter readers, so if you’d like to be the first to hear all our news, just click the button above to sign up – it’s free and we never share your email address with anyone else – promise!
Leave a Reply