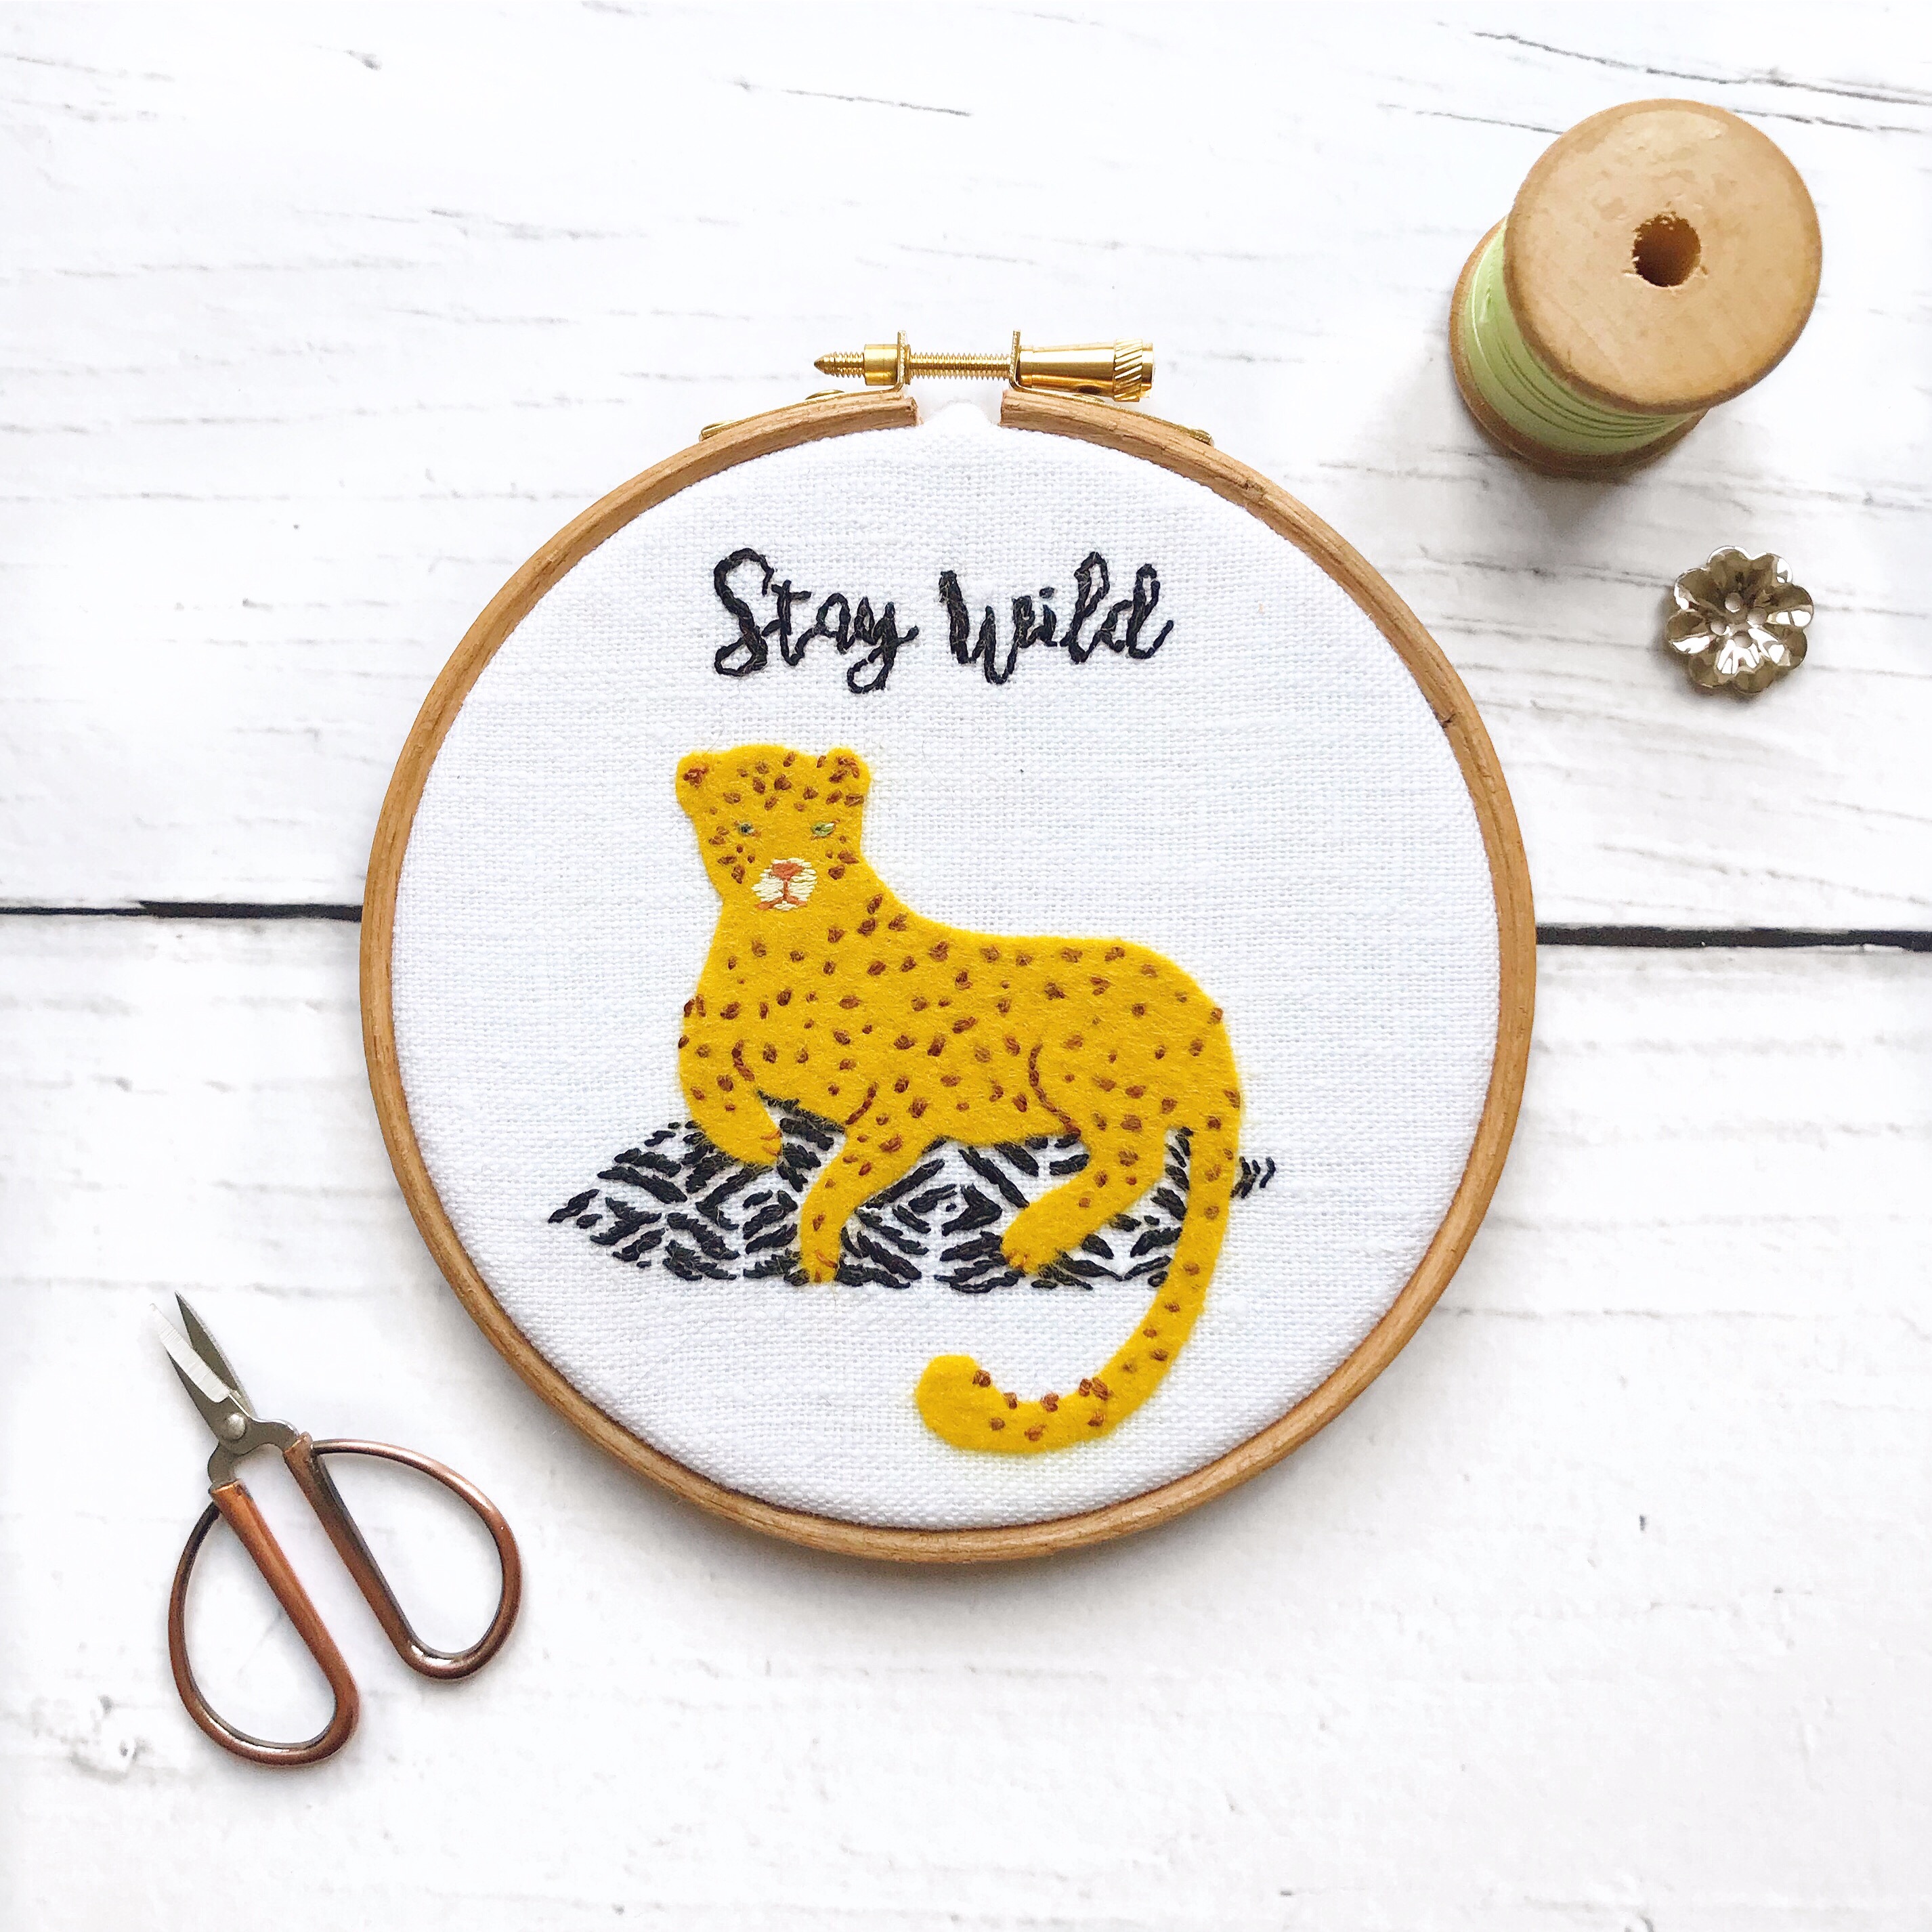
I think the text on this hoop may be my New Year’s resolution! So much more fun than lose weight, go down the gym and all those other more usual resolutions! This little cheetah looks perfectly comfortable reclining on his rather on trend black and white cushion.
The cheetah is a simple felt applique shape, whilst the spots are embroidered in satin stitch. Shown mounted in 5” hoop. I applied a darker stain to the outer of my hoop as I preferred this effect rather than the usual pale beech or bamboo.
If you’d like this tutorial (including template and stitch guide) as a free pdf file, then click the button below and I’ll send it to you. (If you already receive our free newsletter then you’ll find the tutorial waiting for you in your newsletter readers pattern library).
Materials
● 9” square white linen, cotton or blended fabric suitable for hand embroidery (nonstretchy). White felt would also work well for this project
● Stranded cotton floss in black, cream, green, medium brown and brownish-pink (exact shades don’t matter which is why I haven’t specified floss colours)
● Golden yellow felt
● Bondaweb
● Temporary fabric marker pen
● 5” wooden hoop
Method – use two strands of thread except where otherwise stated
Iron the fabric well before beginning.
● Separate the hoop into two parts and place the inner in the centre of your fabric square. Draw around the outside with your temporary fabric marker pen. This will help you position the cheetah applique as you’ll be able to see where it will sit within the hoop.
● Using the REVERSE template trace the cheetah shape onto the paper side of your Bondaweb and cut out roughly. Fuse to your felt and cut out smoothly.
● Peel off the paper backing and position your cheetah on your background fabric using the circle you drew and the photographs as a guide. When you’re happy with the positioning fuse into place with a hot iron, protecting your work with a cloth.
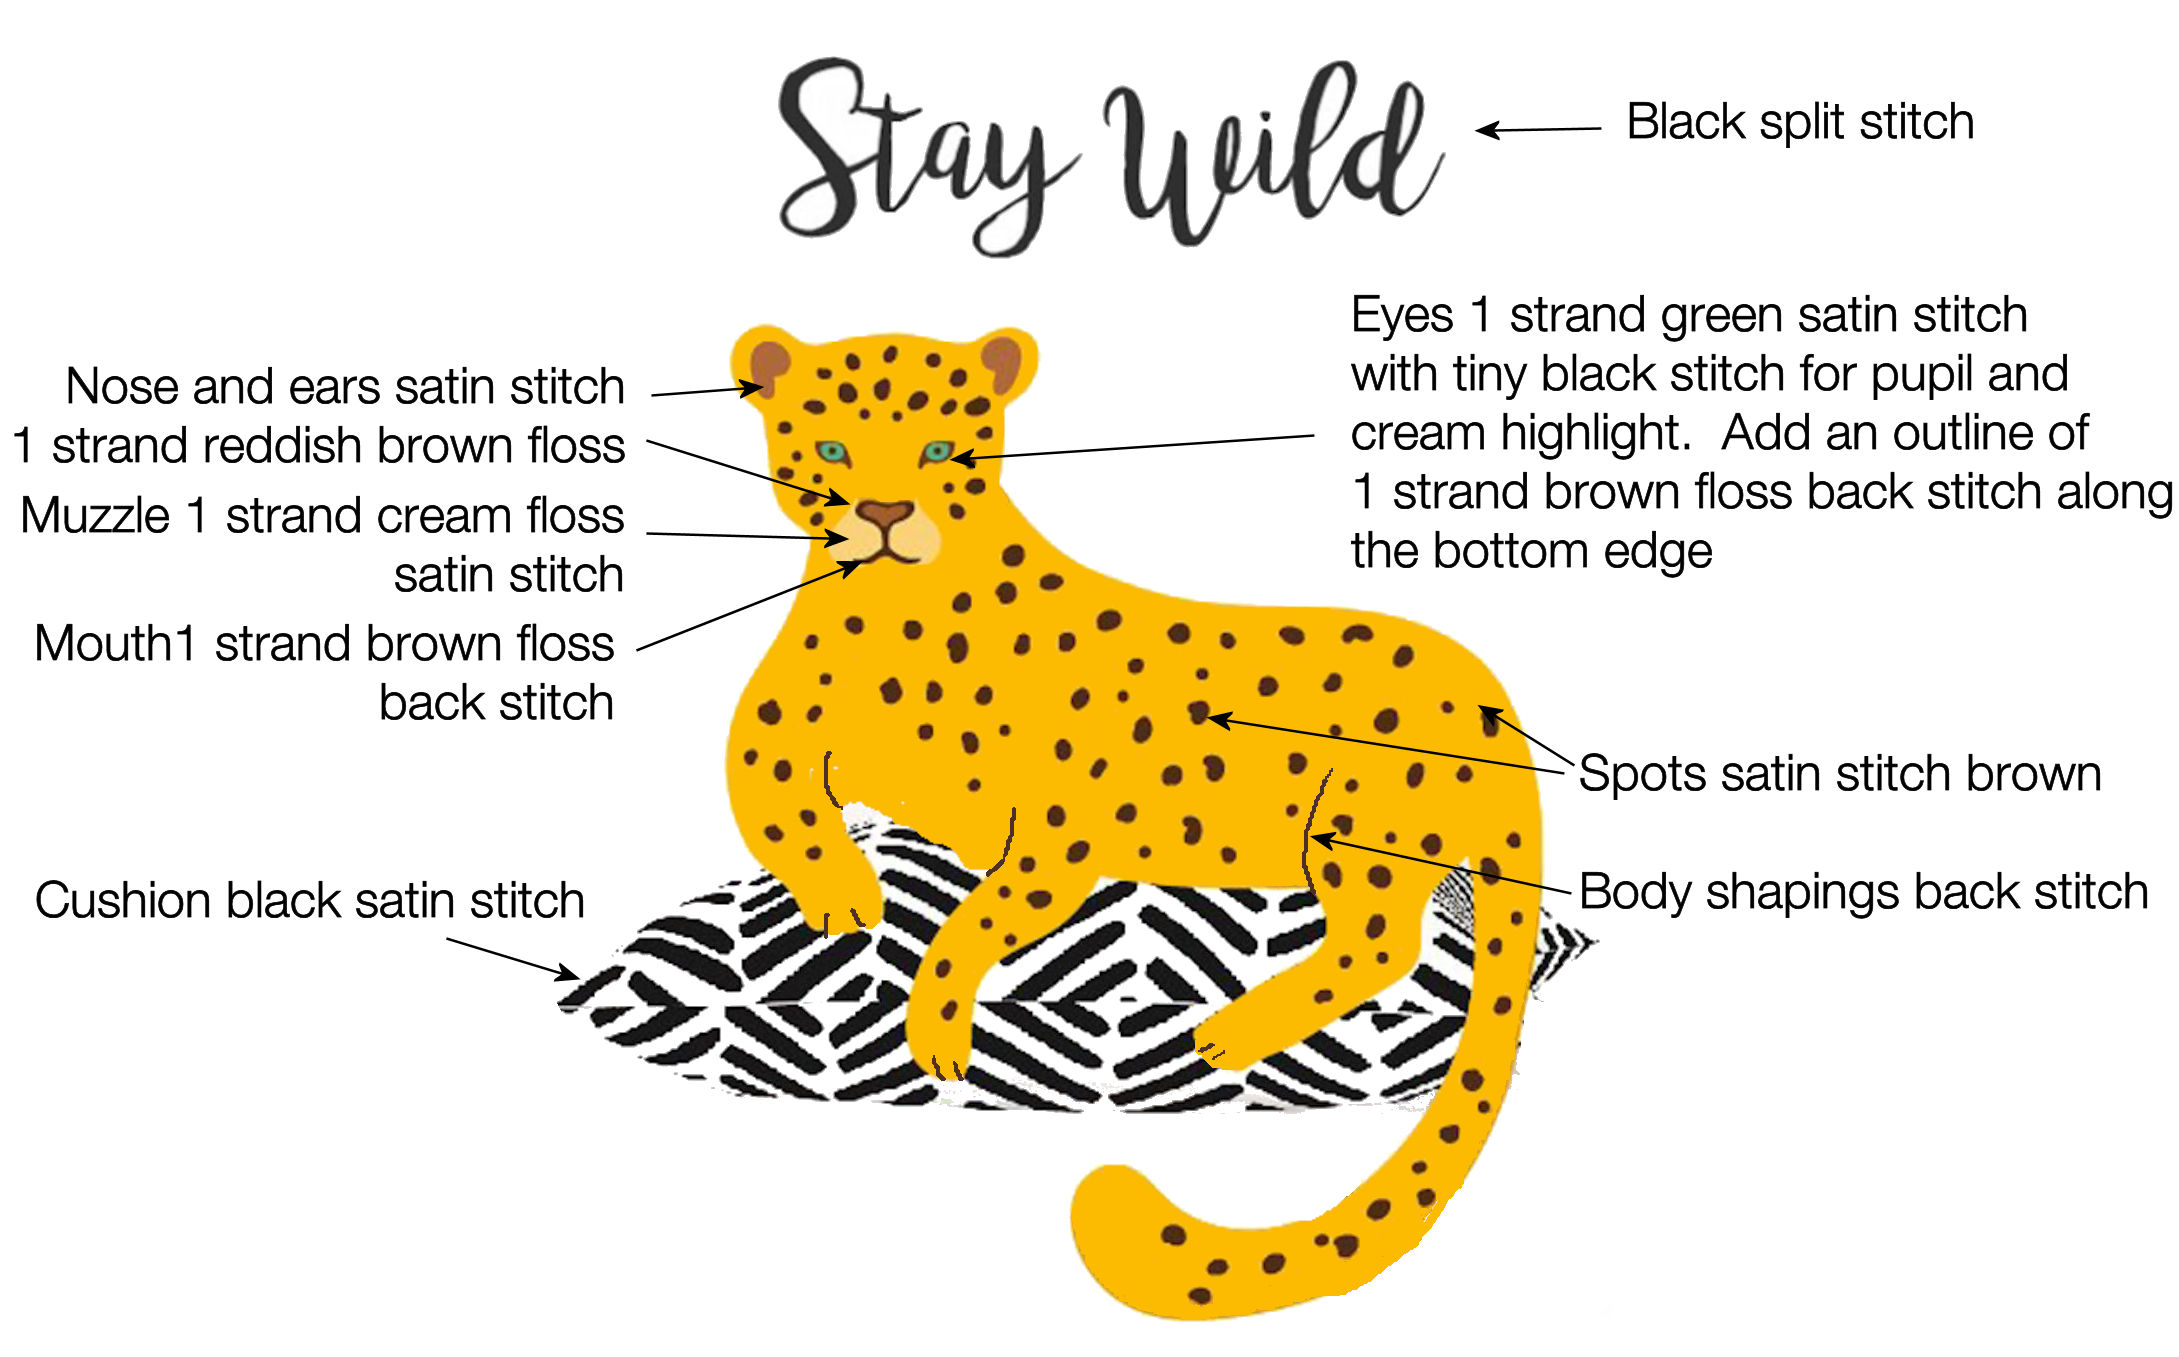
● Transfer the embroidery pattern to the fabric and stitch as shown on the diagram below.
● Working the eyes and other facial features in a single strand of floss enables you to stitch them with more accuracy and achieve better results.
● When finished remove temporary fabric
If you’d like this tutorial (including template and stitch guide) as a free pdf file, then click the button below and I’ll send it to you. (If you already receive our free newsletter then you’ll find the tutorial waiting for you in your newsletter readers pattern library).
love this and love the quote!
thanks for the idea 🙂
Thanks so much Jen xx